(Update with the copy of version: draft) |
(Modified comment string {{Template:PEC_Migrated}} with __NOINDEX__ {{Template:PEC_Migrated}}) |
||
| (4 intermediate revisions by 3 users not shown) | |||
| Line 1: | Line 1: | ||
= Getting started= | = Getting started= | ||
| + | |||
| + | __NOINDEX__ | ||
| + | {{Template:PEC_Migrated}} | ||
| + | |||
| + | |||
__NOTOC__ | __NOTOC__ | ||
| Line 17: | Line 22: | ||
When setting up user accounts, it's important to understand how the Agent Setup user and administrator roles are distinguished and what Genesys product to use to add the accounts. Essentially, two main roles exist: | When setting up user accounts, it's important to understand how the Agent Setup user and administrator roles are distinguished and what Genesys product to use to add the accounts. Essentially, two main roles exist: | ||
| − | *'''Agent Setup users''': Users are assigned to the '''Administrator''' access group, which grants the user the correct role | + | *'''Agent Setup users''': Users are assigned to the '''Administrator''' access group, which grants the user the correct role to perform basic administration of users. To add Agent Setup users accounts to your contact center, [[UserMan#Importing_agent_accounts|import the administrator accounts]] or use [[Documentation:PSAAS:Administrator:gsprov#ProvAGNonAgent|Platform Administration]]. |
*'''Agent Setup administrators''': These users are assigned to both the ''' Administrator''' access group and the '''Agent Setup Administrator''' access group. The Agent Setup Administrator access group is associated with the correct role and permissions to perform administrative tasks in Agent Setup. To add administrator accounts to your contact center, you can either [[UserMan#Importing_agent_accounts|import the administrator accounts]] or use [[Documentation:PSAAS:Administrator:gsprov#ProvAGNonAgent|Platform Administration]]. | *'''Agent Setup administrators''': These users are assigned to both the ''' Administrator''' access group and the '''Agent Setup Administrator''' access group. The Agent Setup Administrator access group is associated with the correct role and permissions to perform administrative tasks in Agent Setup. To add administrator accounts to your contact center, you can either [[UserMan#Importing_agent_accounts|import the administrator accounts]] or use [[Documentation:PSAAS:Administrator:gsprov#ProvAGNonAgent|Platform Administration]]. | ||
| − | Note | + | [[File:Information.png|middle]] '''Note:''' In your access group folder, each of these access groups are prepended with your company name. For example, Genesys Administrator. |
== How do I access the Agent Setup interface?== | == How do I access the Agent Setup interface?== | ||
| Line 35: | Line 40: | ||
[[File:Information.png|middle]] '''Note:''' You are not required to enter a Tenant name. | [[File:Information.png|middle]] '''Note:''' You are not required to enter a Tenant name. | ||
| − | |media1= | + | |media1=ASLogin.png |
}} | }} | ||
| Line 41: | Line 46: | ||
|title=Logging out | |title=Logging out | ||
|text=When you have completed your administration tasks, click the menu in the upper-right corner, and select '''Log Out'''. | |text=When you have completed your administration tasks, click the menu in the upper-right corner, and select '''Log Out'''. | ||
| − | |media1= | + | |media1=ASLogOut.png |
| + | |||
}} | }} | ||
[[Category:V:PSAAS:Public]] | [[Category:V:PSAAS:Public]] | ||
Latest revision as of 12:32, October 2, 2020
Getting started
Before you start, review the following web browser requirements and access information to gain a full understanding of the Agent Setup tool. The intended audience for this guide are administrators that are responsible for creating and managing user accounts, configuring the call center settings, and assigning global settings to agent groups.
Web browser requirements
You access the Agent Setup interface through one of the following supported web browsers:
- Microsoft Internet Explorer 11
- Google Chrome 54 or later
- Mozilla Firefox 45 or later
- Microsoft Edge
Agent Setup User Roles
When setting up user accounts, it's important to understand how the Agent Setup user and administrator roles are distinguished and what Genesys product to use to add the accounts. Essentially, two main roles exist:
- Agent Setup users: Users are assigned to the Administrator access group, which grants the user the correct role to perform basic administration of users. To add Agent Setup users accounts to your contact center, import the administrator accounts or use Platform Administration.
- Agent Setup administrators: These users are assigned to both the Administrator access group and the Agent Setup Administrator access group. The Agent Setup Administrator access group is associated with the correct role and permissions to perform administrative tasks in Agent Setup. To add administrator accounts to your contact center, you can either import the administrator accounts or use Platform Administration.
![]() Note: In your access group folder, each of these access groups are prepended with your company name. For example, Genesys Administrator.
Note: In your access group folder, each of these access groups are prepended with your company name. For example, Genesys Administrator.
How do I access the Agent Setup interface?
Access to Agent Setup requires a web browser. If you haven't already, read Before you set up an agent.
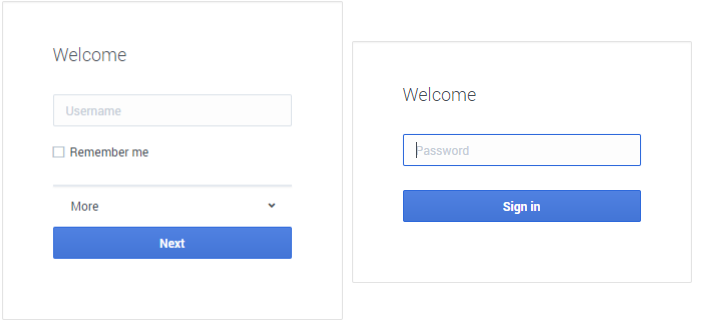
You can access the Agent Setup interface by logging into your Genesys Portal and clicking the Agent Setup icon.


