(→How Do I Record a Call) |
|||
| Line 13: | Line 13: | ||
| [[File:gplus_adp_record_play.png|link=]] | | [[File:gplus_adp_record_play.png|link=]] | ||
| Records the call. | | Records the call. | ||
| − | | After you click the '''Record''' button, the call status indicator is red | + | | After you click the '''Record''' button, the call status indicator is red [[File:gplus_adapt_sf_record_callstatus.png|link=]]. The recording continues until you pause or stop the recording. |
|- | |- | ||
| [[File:gplus_adp_icon_record_stop.png|link=]] | | [[File:gplus_adp_icon_record_stop.png|link=]] | ||
Revision as of 14:52, October 20, 2015
Recording a Call
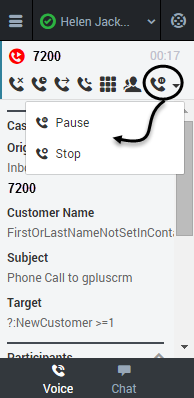
The Call Recording functionality enables you to record the current conversation or consultation call with a customer or an internal caller. To record a call, you click the Record button or choose an action from the drop-down list box. Your call center might be configured to record all calls by default. In this case, you can pause, stop, or restart a recording using the Record options.
The following table describes the actions that you can perform:
| Button | Action | Description |
|---|---|---|
| Records the call. | After you click the Record button, the call status indicator is red | |
| Stops the recording. | After you stop the recording, the call status indicator is green and the Pause button returns to be the Record button. | |
| Pauses the recording. | When you pause the recording, the Pause button becomes the Resume button. |
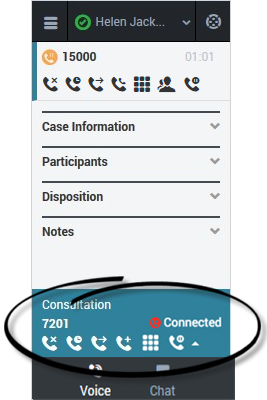
You can also record a consultation. During a voice consultation, look for the controls at the bottom of the adapter.
Comments or questions about this documentation? Contact us for support!


