Working with the Voice Channel
The Gplus Adapter for Salesforce includes the voice media channel, which you can use to:
- Handle an incoming call
- Dial a call
- Transfer a call
- Perform an instant conference call
- Initiate a consultation
- Record a call
Watch the following video to see a comprehensive overview of the voice channel, and then read on through the documentation for more details and instructions:
| [+] Show video: Working with the Voice Channel |
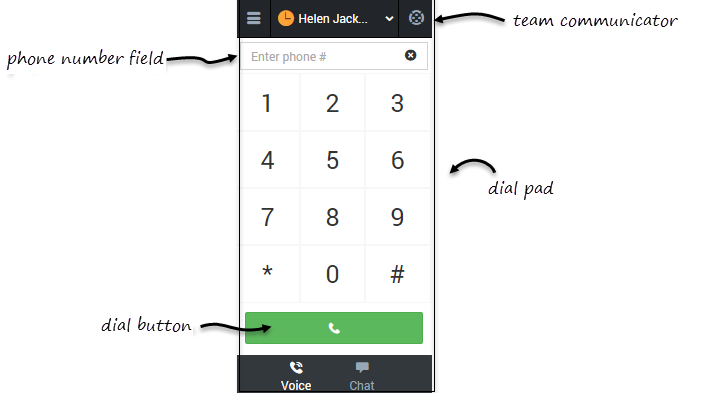
When you navigate to the voice channel, you'll see the default view where you can dial a call or use Team Communicator to find a contact.
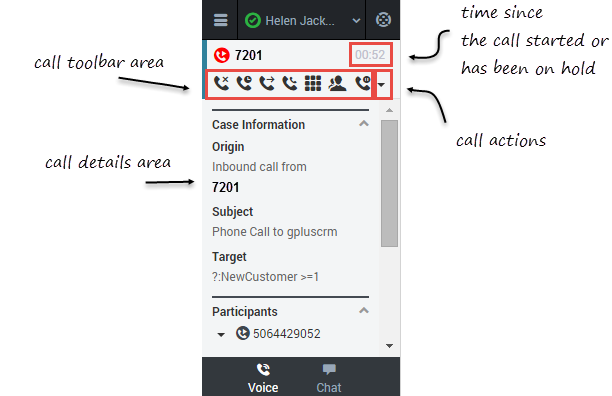
Once you have an active call — because you called someone or someone called you — the main voice channel view changes to the call view. This view has two main areas: call toolbar and call details.
Call Toolbar
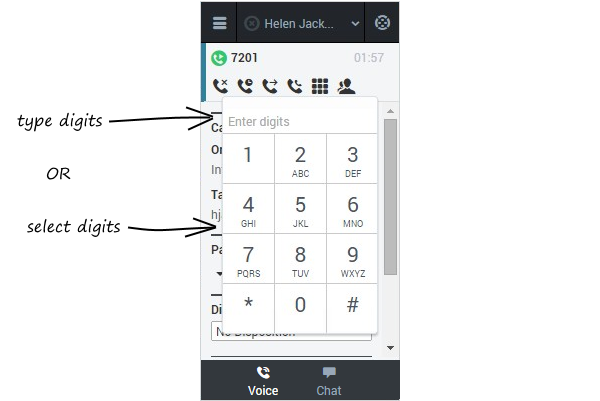
When you have an active call, the call toolbar displays icons for actions that you can perform during a call. Depending on adapter configuration, you might see some or all of the toolbar icons described in the following table:
Call Details
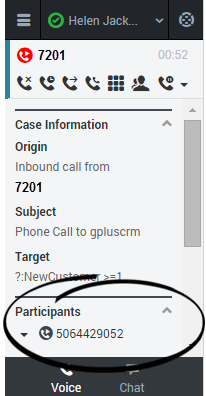
The call details view shows you all the data the adapter has about the call, and it provides fields that you can edit to add more information:
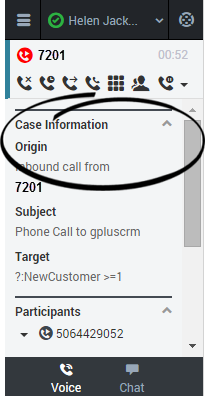
Case Information
The Case Information section shows you read-only information about the call — the exact information is determined by your administrator.
Here are a few examples of some information you might see in your call view:
- Origin
- Target
- Contact name
- Call type
- Account information
- Subject
Depending how your administrator configured your agent, you might be able to add, edit, or delete case information. For more information, see How Do I Edit Case Information?
Case information fields might can contain a URL that you can click to access more information.
Participants
The Participants section shows you read-only information about who else is on the call and the state of the participant (Ringing, Connected, Ended, and so on). This section is especially helpful when you're trying to keep track of who is participating in a conference call.
Disposition
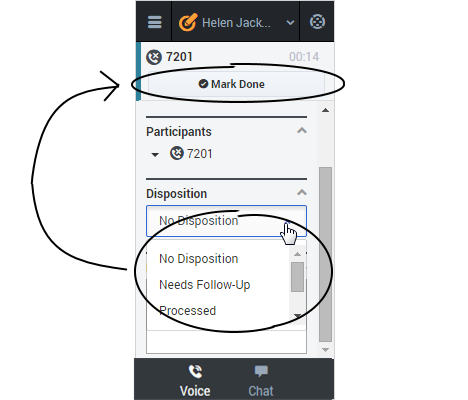
If configured by your administrator, you can change the disposition for a call either during the call or as part of your after-call work. You can use this field to record the business outcome of the call. To update, click the drop-down list, and then select a disposition. Ensure that you don't click Mark Done first before you select a disposition. You can't make any further changes after you click Mark Done.
Notes
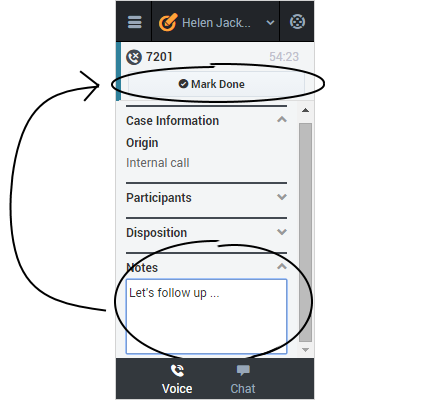
If configured by your administrator, you can add notes either during the call or as part of your after call work. To update, just enter your comments in the text field. Ensure that you don't click Mark Done first before you add a note. You can't make any further changes after you click Mark Done.
Finishing a Call
When your call is over, either because the other party left the call or you clicked Hang up ![]() , you might need to update some information in the call details area (such as disposition or notes). Your adapter might be configured to automatically change your status to After Call Work to give you time to complete this task; if not, you can change the status yourself. Your adapter might be also configured to automatically mark the call as done as soon as the call is over.
, you might need to update some information in the call details area (such as disposition or notes). Your adapter might be configured to automatically change your status to After Call Work to give you time to complete this task; if not, you can change the status yourself. Your adapter might be also configured to automatically mark the call as done as soon as the call is over.
After you finish your after-call work, you can click Mark Done, which completes the call and sends you back to the main voice channel view. At this time, your status might automatically change to Ready, Not Ready, or some other value; otherwise, you have to change it yourself.
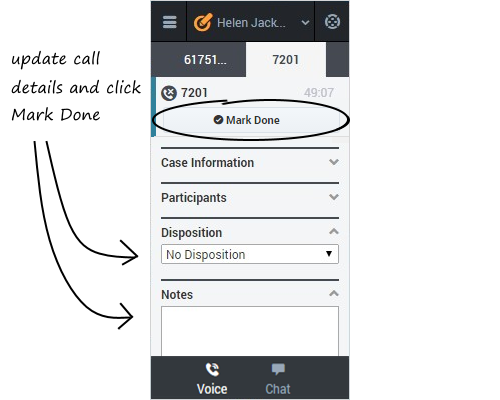
If you are finishing multiple calls, just click the tab for a call, enter any necessary information in the call details area, and click Mark Done. Then, move on to your next call tab.

