Genesys CX Insights
Genesys Customer Experience Insights (Genesys CX Insights or sometimes GCXI) provides a presentation layer that extracts data from the Genesys Info Mart database, and presents it in readable historical reports to enable business and contact center managers to make better business decisions for streamlining operations, reducing costs, and providing better services.
Genesys CX Insights has replaced Genesys Interactive Insights (GI2) as the historical reporting presentation layer. See also Genesys Info Mart and Reporting and Analytics Aggregates (RAA).
Glossary
Contents
Genesys CX Insights User Management
Genesys Customer Experience Insights (GCXI or Genesys CX Insights) provides Historical Reporting tools. Genesys CX Insights credentials are managed separately from other Genesys PureEngage Cloud components. This page describes the steps you can take to create an account for a new user, change your password, or to change another user's password.
Changing your own password
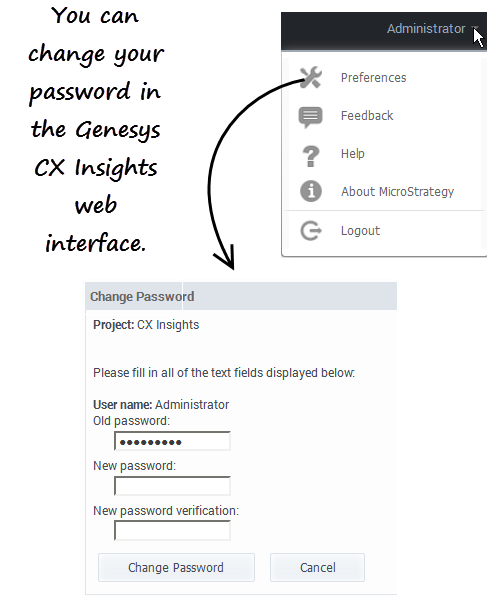
Use the following steps to change your password. Not all users are permitted to change their password; contact your administrator to find out if the functionality described on this page is available for your use.
- On the Genesys PureEngage Cloud Portal, click All Apps > Reporting.
- At the Genesys CX Insights login screen, enter your user name and current password.
- On the Genesys CX Insights menu, click your user name, and click Preferences.
- Click Change Password.
- In the Old Password field, type your current password.
- In the New Password field, type your new password, and re-type it in the New Password Verification field.
- Click Change Password.
Changing another user's password
Use the following steps to change a password for another user (for example when they have forgotten their password) or to otherwise manage an existing user account.
To edit another user's account, you must log in as a member of a group that has the Create And Edit Users And Groups privilege.
- In your web browser, open the MicroStrategy Web Administrator page:
http://<hostname>:<port>/MicroStrategy/servlet/mstrServerAdmin
- On the page that appears, select your server.
- On the MicroStrategy Web Administrator login screen, enter your user name and current password, and click Login. The Tools page opens.
- Click User Manager.
- Click a group of which the user is a member. A list appears, showing all the users in that group.
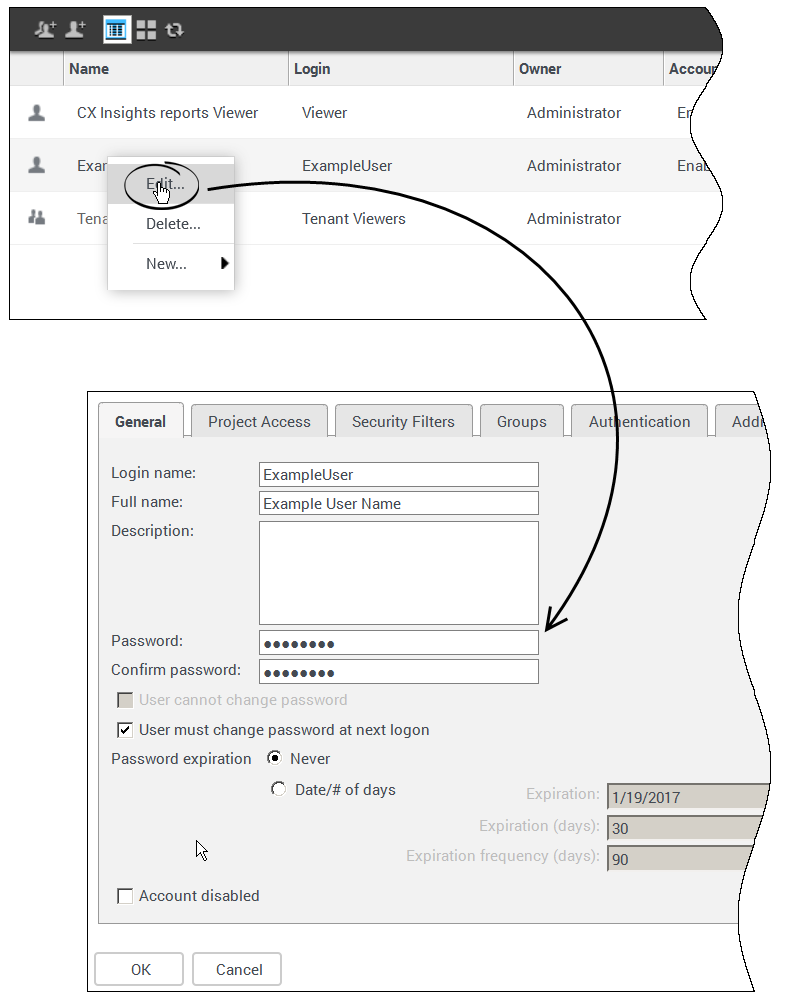
- Right-click the user's name, and in the menu, click Edit.
- In the Password field, enter the new password, and enter it again in the Confirm Password field.
- Select User must change password at next login, and make any other changes if required.
- Click OK.
Creating a new user
Use the following steps to create a new user account.
To edit another user's account, you must log in as a member of a group that has the Create And Edit Users And Groups privilege.
- In your web browser, open the MicroStrategy Web Administrator page:
http://<hostname>:<port>/MicroStrategy/servlet/mstrServerAdmin
- On the page that appears, select your server.
- On the MicroStrategy Web Administrator login screen, enter your user name and current password, and click Login. The Tools page opens.
- Click User Manager.
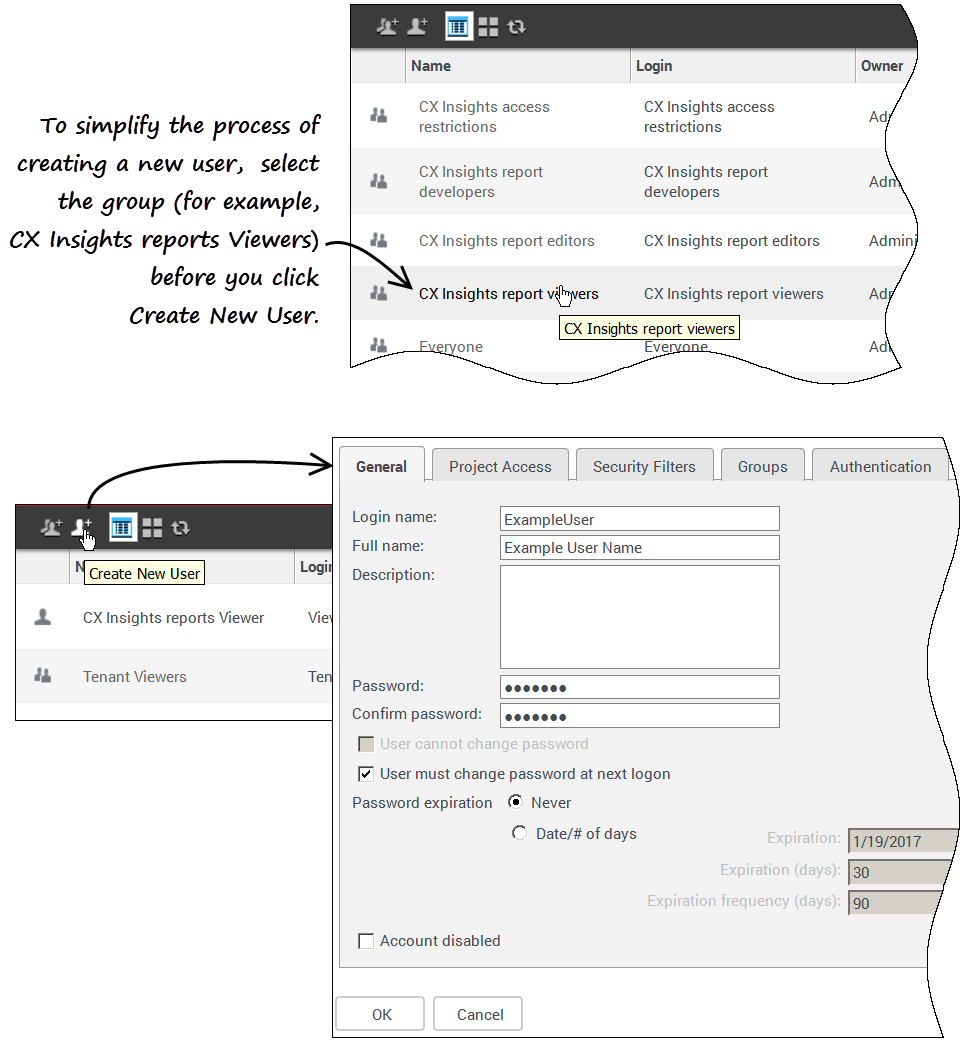
- In the menu, click Create New User.
- Specify user information as appropriate, on each tab in the editor. If you need more information about any field, see the MicroStrategy Web Administrator Help. Be sure to:
- Include a Login Name, Full Name, Password, Confirm Password and other selections in accordance with your password policies (on the General tab).
- Assign at least one Group (on the Groups tab).
- Click OK.


