Contents
- 1 Integrating with Genesys Hub
- 1.1 1. Set up your account
- 1.2 2. Create a Twitter account channel
- 1.3 3. Create a Twitter service channel
- 1.4 4. Create a Facebook account channel
- 1.5 5. Create a Facebook service channel
- 1.6 6. Create an administrator user for the account
- 1.7 Production toggle
- 1.8 Best practices for managing keywords in Twitter service channels
Integrating with Genesys Hub
Genesys Hub is our centralized platform that connects to Twitter and Facebook. Complete the steps below to set up an account with Genesys Hub and enable the Facebook and Twitter channels and services. Once you complete the steps on this page, return to Setting up Facebook and Twitter to finish the rest of the setup.
1. Set up your account
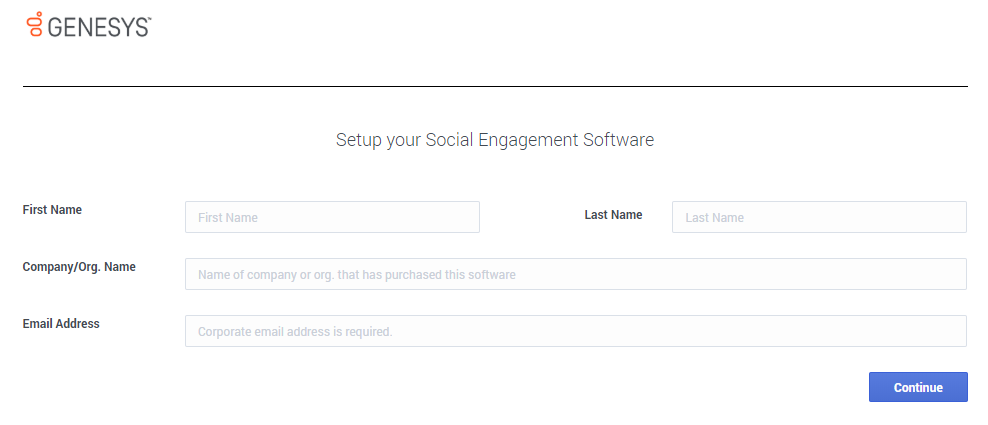
Go to https://socialanalytics.genesyscloud.com/gse/signup and complete the form.
You should receive a confirmation email titled "Confirmation required for Genesys Social Engagement deployment" (don't forget to check your spam folder). Follow the steps in the email and login to Genesys Hub.
2. Create a Twitter account channel
Create a Twitter account channel to authenticate with Twitter using your organization's Twitter handle (login) and password.
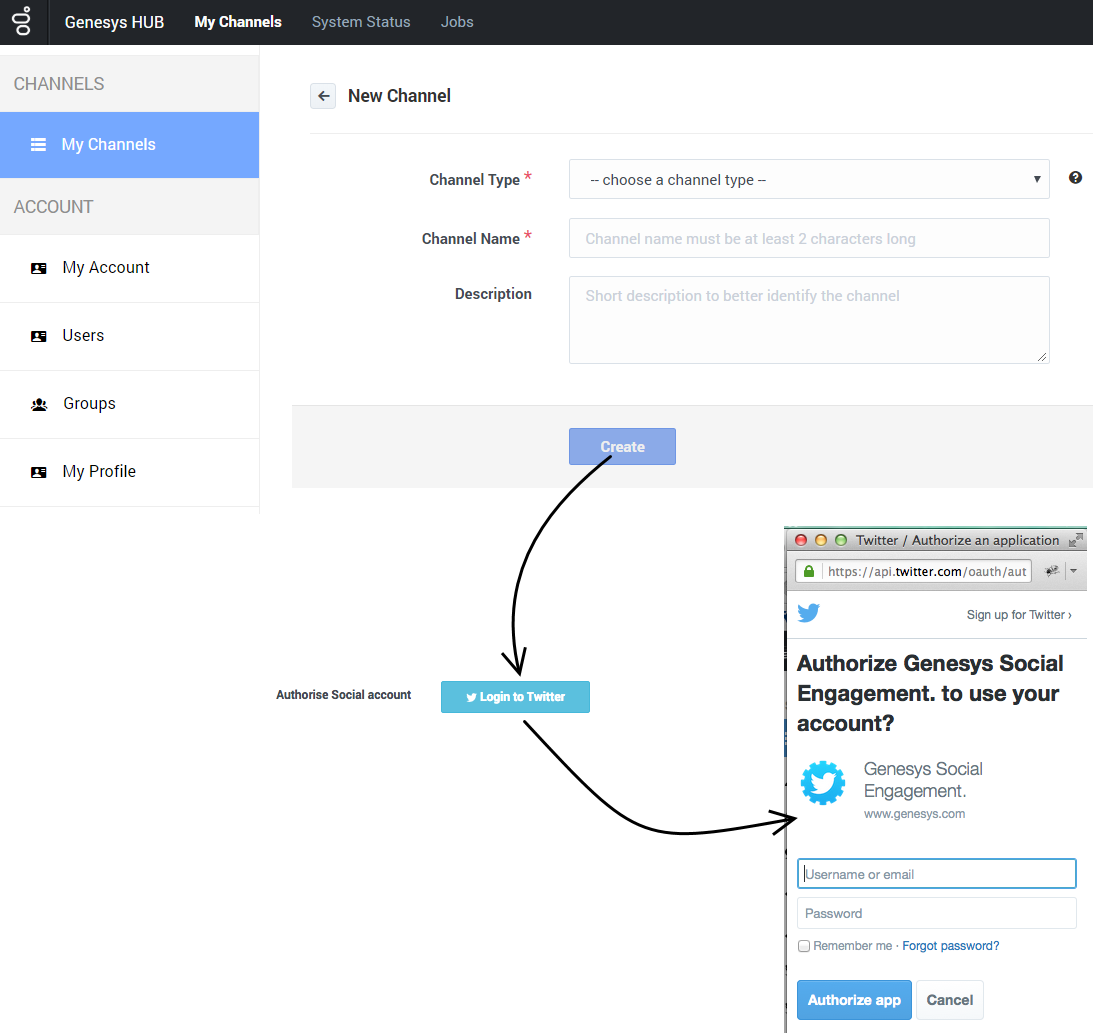
Under My Channels in the left navigation menu, click +Add Channel.
- Choose Twitter:Account for the Channel Type.
- Set the Channel Name to <your channel's Twitter handle> - Twitter Account. Example: @Genesys - Twitter Account.
- Add an optional description of how you will use the channel.
Save your channel and click Login to Twitter.
Enter the Twitter credentials for your organization: username (handle) or email, and the password associated with your Twitter account. Important: Also check Remember me.
If you have successfully authenticated, you will see the following message: Access_token successfully saved.
3. Create a Twitter service channel
Create a Twitter service channel to listen for mentions of your keyword(s) on Twitter.
Under My Channels in the left navigation menu, click +Add Channel.
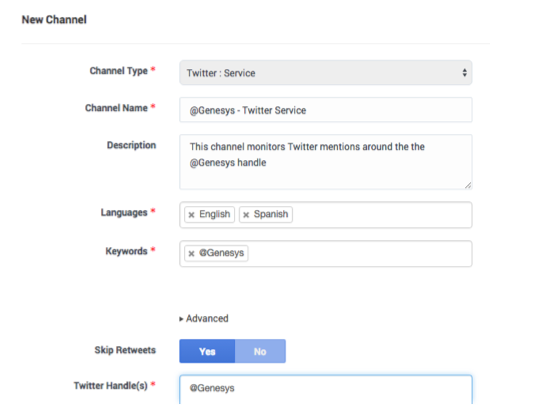
- Choose Twitter:Service for the Channel Type.
- Set the Channel Name to <your channel's Twitter handle> - Twitter Service. Example: @Genesys - Twitter Service.
- Add an optional description of how you will use the channel.
After saving your channel, the application displays an extended view where you can configure additional settings:
- Add any applicable languages.
- For Keywords, enter the handle you want to monitor for mentions, for example @Genesys, then hit Return or Tab. You can include other words or phrases to listen for, such as #Genesys. These keywords are the way Hub gathers mentions from Twitter -- there is no mechanism for excluding posts with certain mentions. See Best Practices for Managing Keywords in Twitter Service Channels below for more information about using a broader range of words and phrases.
- If you choose Skip Retweets, your system will not source tweets that have been retweeted, which may help cut out clutter and noise. You may want to select No if you want to analyze retweets and viral activity.
- In Twitter Handle(s), just type the Twitter handle that you will be using to respond, for example @Genesys. You can only respond with one handle per channel.
4. Create a Facebook account channel
Create a Facebook account channel to authenticate with Facebook using your organization's Facebook administrator login credentials. These user credentials must have admin access to all the pages you want to associate with this channel. For simplicity, make sure you are logged into Facebook with the same browser you're using for this setup.
Under My Channels in the left navigation menu, click +Add Channel.
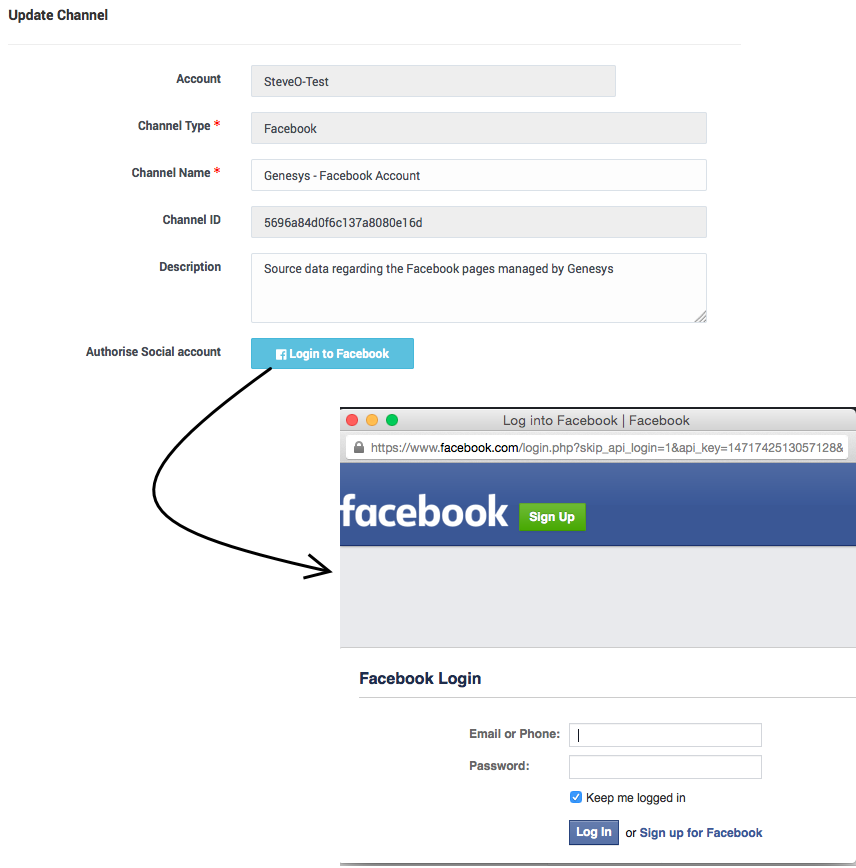
- Choose Facebook:Account for the Channel Type.
- Set the Channel Name to <company name> - Facebook Account. Example: Genesys - Facebook Account.
- Add an optional description of how you will use the channel.
After saving your channel, the application displays an extended view where you can Login to Facebook.
Use the Facebook admin credentials for your organization. Important: Also check Keep me logged in.
If you have successfully authenticated, you will see the following message: access_token successfully saved, close window.
5. Create a Facebook service channel
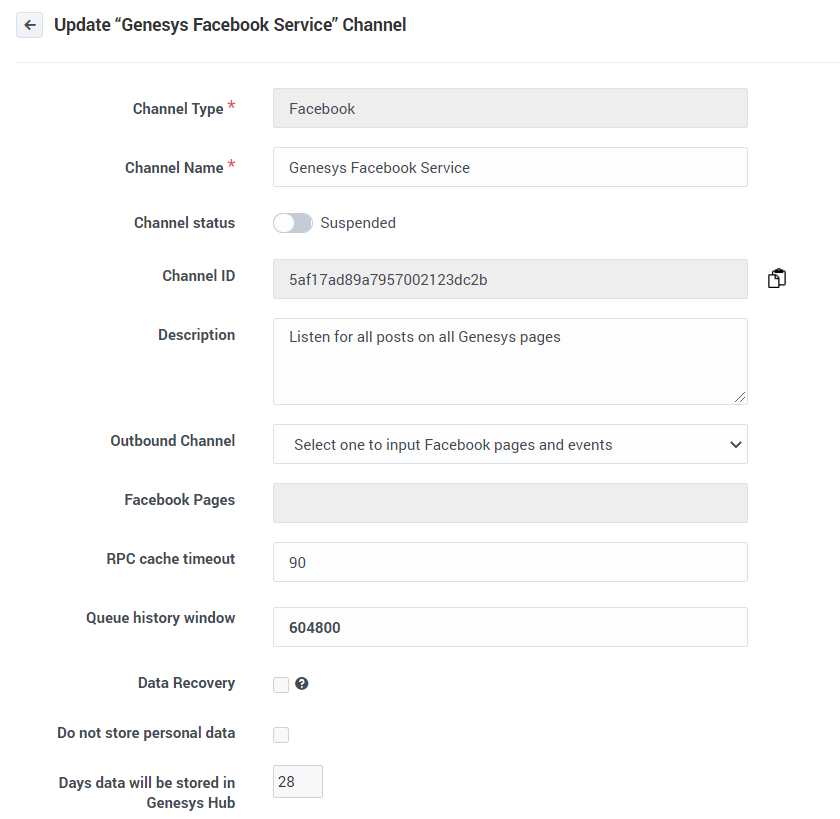
Create a Facebook service channel to listen for posts, comments and messages on Facebook. Under My Channels in the left navigation menu, click +Add Channel.
- Choose Facebook:Service for the Channel Type.
- Set the Channel Name to <company name> - Facebook Service. Example: Genesys - Facebook Service.
- Add an optional description of how you will use the channel.
After saving your channel, the application displays an extended view where you can configure additional settings:
- Choose the pages you want to monitor from the list under Facebook Pages. This list is made up of all the pages your login account can administer.
6. Create an administrator user for the account
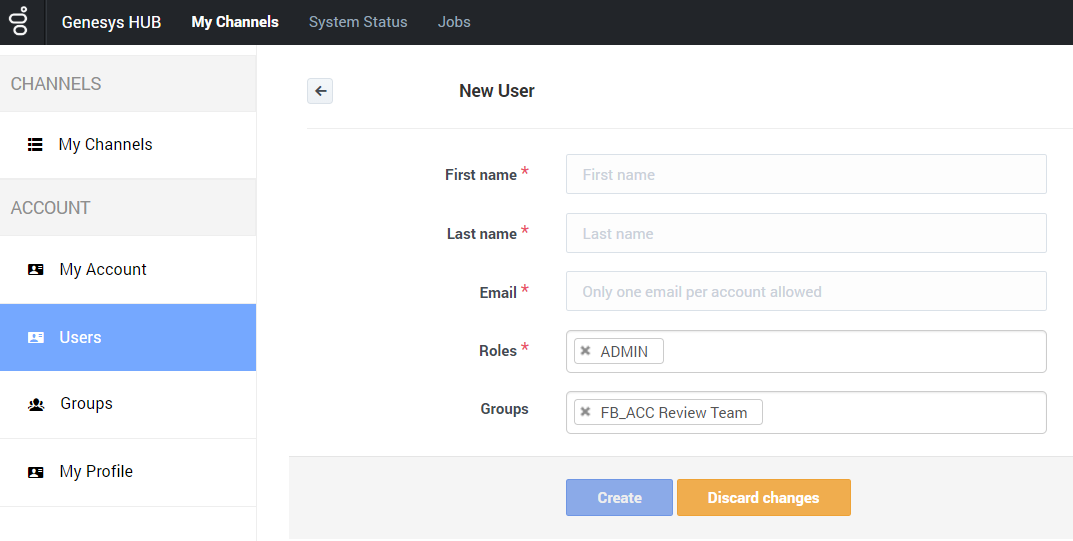
Create an administrator user account in Genesys Hub. Under Users in the left navigation menu, click +Add User.
- For First Name, use your company's name followed by a 1; for example, Genesys1. For Last Name field, type admin.
- In the Email field, type an email address using a format like the following: Genesys1_Admin@GenSocialEngage.com.
- Make sure to choose Admin for the role.
After you create this user, return to the Users menu. You should see a list of the users associated with the account that you have set up. Lastly, reset the password for the administrator user to finish the setup.
Production toggle
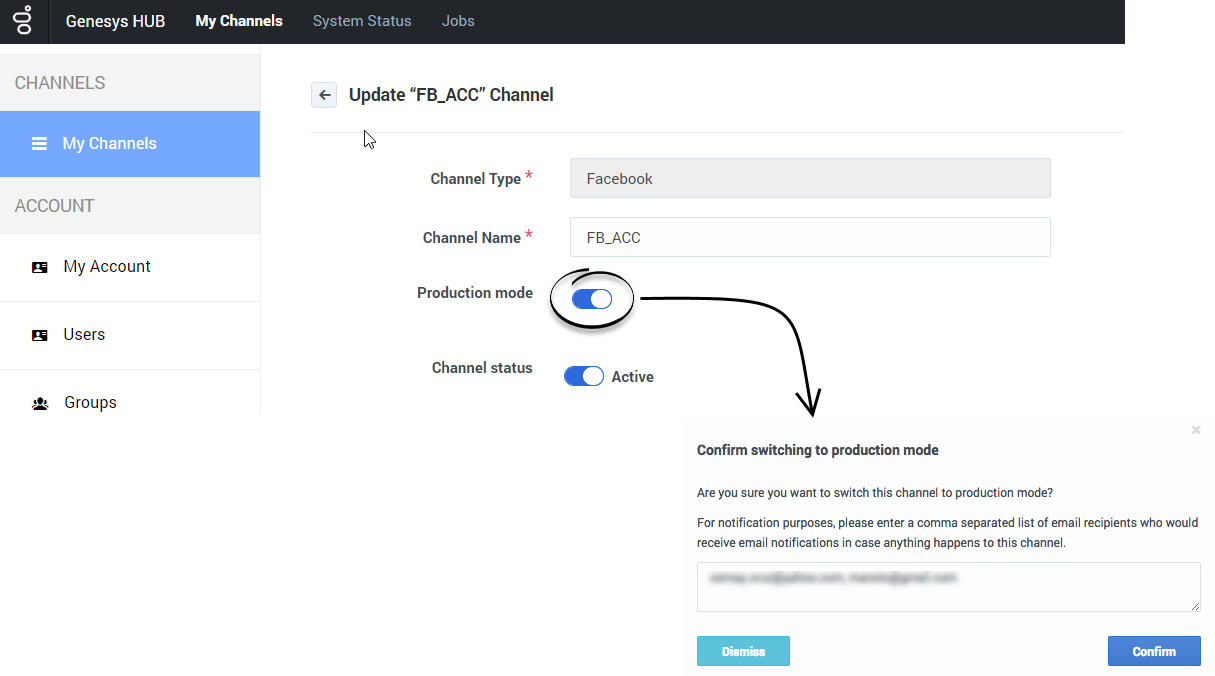
You can toggle between production and non-production (lab, staging, test) modes for using a switch on each channel.
Under My Channels in the left navigation menu, edit a channel and slide the toggle to the right to engage Production mode. On the confirmation window, add any email address that should receive notifications for the channel. This creates a distribution list in the Hub Status page.
Note the following:
- Internal Service Level Agreements (SLAs) apply only to accounts in production mode.
- Genesys carries out recovery, or assists with it, for production accounts only.
- Production mode is indicated in reports.
- Production mode requires all required licenses to be in place.
Best practices for managing keywords in Twitter service channels
When setting up a Twitter:Service channel, you can add any text in the Keyword field. For example, if we set up a channel to monitor mentions of Genesys on Twitter, some appropriate keywords might be @Genesys, #Genesys and Genesys software.
Make sure to use keywords that are specific to your business or use case and not too broad or ambiguous. You can check this using Twitter's search functionality at https://twitter.com/search-home. Enter each keyword, one at a time, and assess the search results. For example, if your company is called "United Ultra Local Bank Inc.", you might want to use the keyword #United. This would be a mistake, as it would return a flood of posts related to topics as broad as #United Nations, #United States, Manchester #United, and so on. Even worse would be #Check, savings account, #balance, or overdraft as these are even more generic.
Ambiguous keywords can clutter your inbound feed and, in extreme cases, Twitter might cut off access to data if the volumes are too high. If a channel's inbound traffic exceeds 300 tweets per minute for a certain keyword, Genesys Hub automatically removes the keyword from the channel to keep data volumes from exceeding Twitter's thresholds. After three days, Hub unblocks the keyword and you can add it back to your channel. If you need to add the keyword before the three days are up, contact your Genesys representative.
After you re-add the keyword, you can run a recovery task to get the data that was not monitored while the keyword was blocked. Note: Hub will not re-block the keyword while data recovery is running.

