How to Set Up Your Teams
You can organize the personnel in your contact center into groups, called Teams, to better reflect your organizational structure and to meet your particular needs. You then set up Access Groups within the Teams to control data access and role privileges within your organization.
[+] Why use Access Groups to control what information users can access?
The minimum Access Groups that Genesys recommends in a Team are a Managers Access Group and a Supervisors Access Group. By default, these groups should have full access to agent-related objects (Places, Agent Logins, and DN Extensions), and Read access to most other objects, including users. You can customize other permissions and privileges of each of these Access Groups as required. For example, you may want to enable only one or both of these Groups to view Real Time Reporting information.
The Basics
From the Access Groups and Users pages in Platform Administration you are going to:
- Create two Access Groups, one for Managers and one for Supervisors.
- Create the new Team.
- Add Managers and Supervisors to the Team, and to the Access Groups as appropriate.
- Set up permissions to the Team folder for each Access Group.
Create Access Groups for Managers and Supervisors
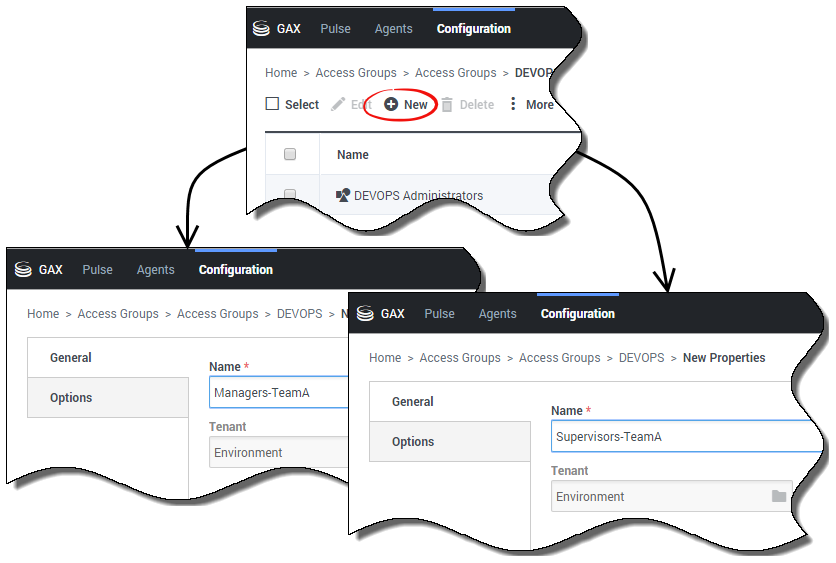
From the list of Access Groups in Configuration Manager, navigate to the folder where you are going to create the Managers Access Group and click New. Then do the same to create the Supervisors Access Group.
Create the Team
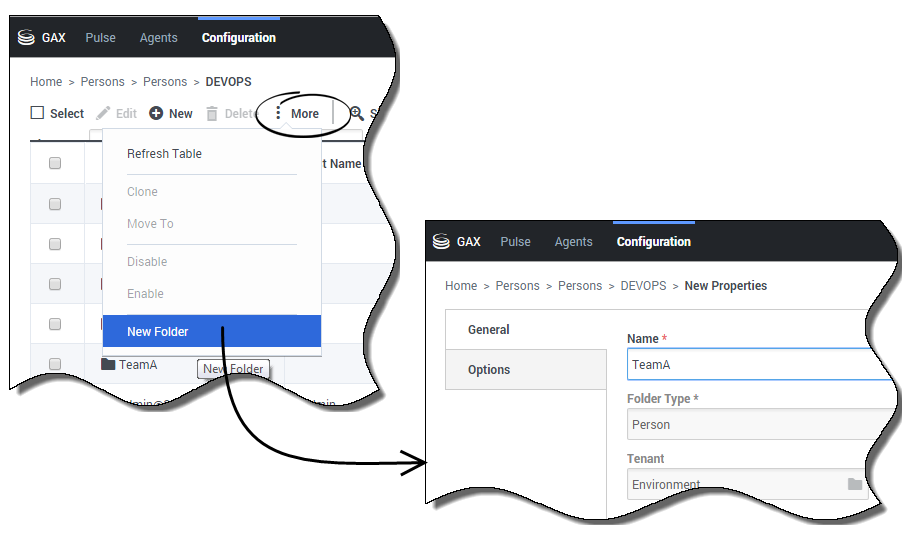
From the list of Persons in Configuration Manager, navigate to the folder in which you want to create the Team and use the More menu to create a new folder. This folder represents the Team, and will contain Team members, both individual users and groups of users.
Add Managers and Supervisors to the Team ...
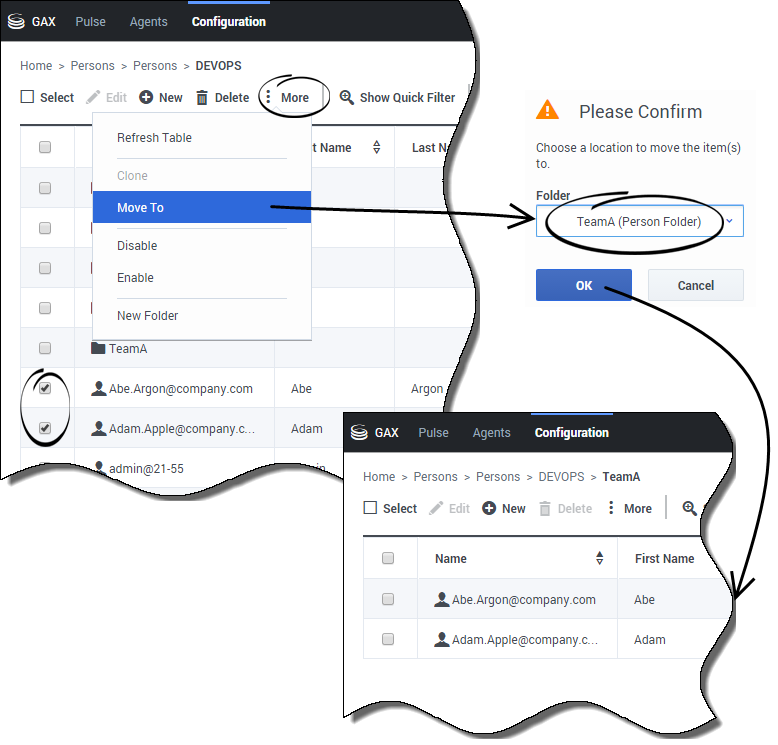
In the Persons list of the folder that contains the Managers and/or Supervisors that you want to add to this Team, use the More menu to move the selected Manager to the Team folder that you just created. If the Managers and Supervisors are currently in different folders, simply repeat this action in each folder. Within a given folder, you can select and move the Managers and/or Supervisors individually, or select them all and then move them to the Team.
... and to the Access Groups
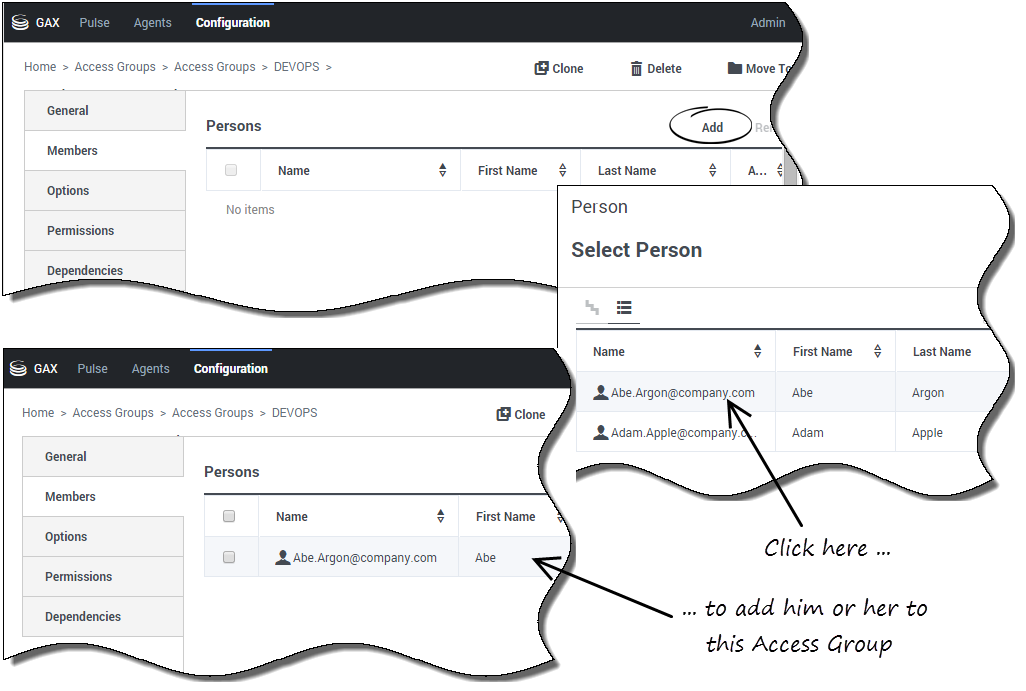
From the Members tab in the properties of the Managers Access Group, click Add and navigate to the Team folder, and select the Managers to be added to the Group. A reverse entry will be made automatically to add the Manager Access Group to the Members Of tab of each Manager. Do these steps again to add Supervisors to the Supervisors Access Group.
Set permissions for Members of the Access Group
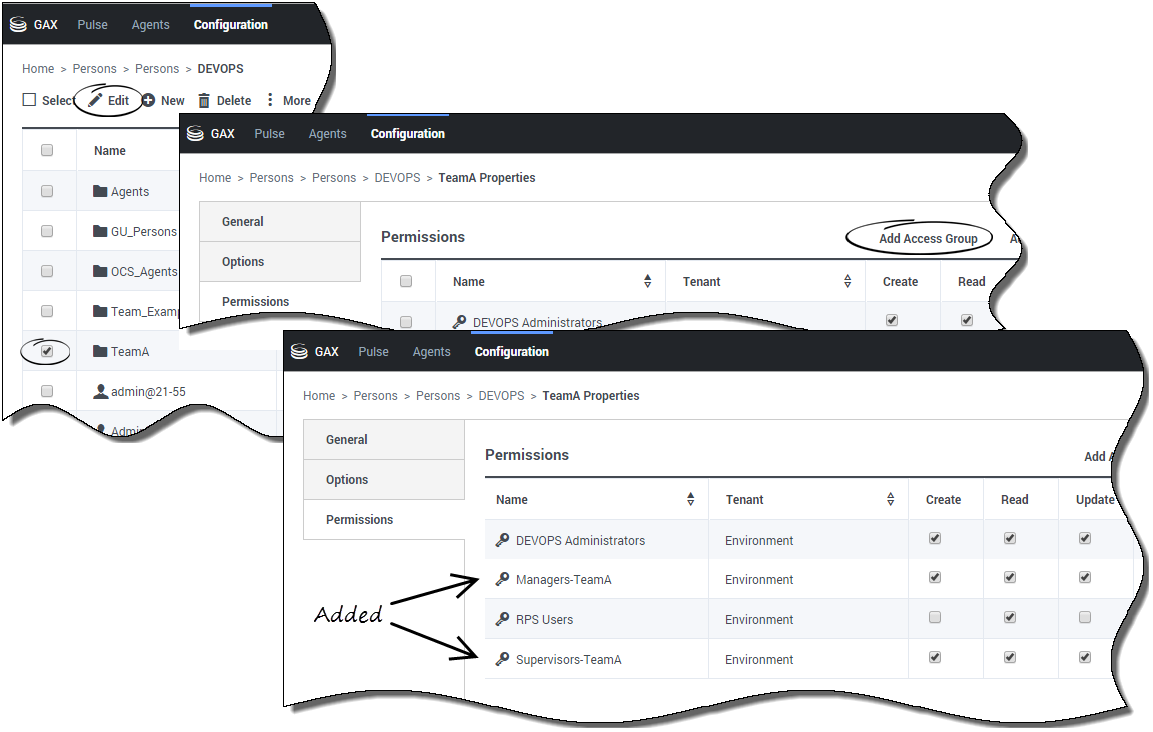
For your Team, you want the Managers and Supervisors Access Groups to be able to make changes to the Team, and you allow this on the Permissions tab of the Team folder. If the Managers and Supervisors Access Groups are not listed on this tab, click Add Access Group to add them. Then set the required permissions.

