
Contents
Collection Schedules
This section describes to configure log file collection schedules for LFMT Collector.
Adding a LFMT Collection Schedule
- In Genesys Administrator Extension, from the LFMT tile menu, select Collection Schedules.
- Click the
 button in the Collection Schedules pane. The New Collection Schedule pane will appear.
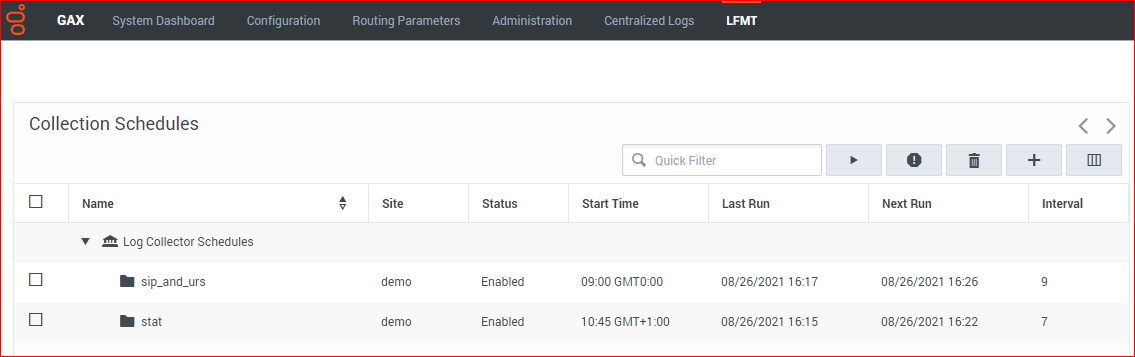
- Provide the Name (i.e. "sip_and_urs"), Start (i.e. 09:00), Timezone, Interval (i.e. "9" [minutes]), and Exception (i.e. 02:15,02:45) for the new LFMT Collector Schedule.
- Select the appropriate CME Applications for the new LFMT Collector Schedule.
*the example below has the "sip" and "urs" CME applications selected
**these application log files will therefore be collected every 9 minutes from the "cc-app-dev-demo-3" Host via the Workbench Agent 8.5 component running on the Host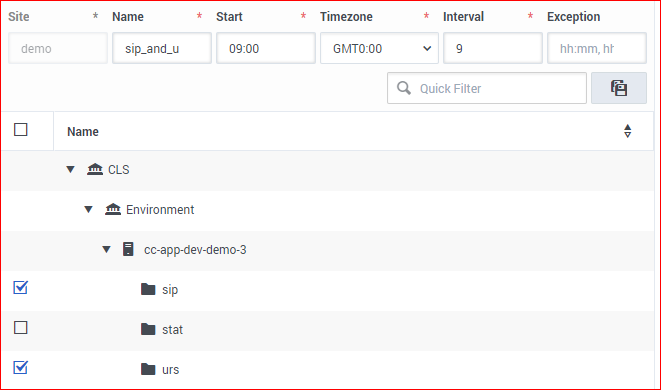
- Click the
 button to save the new LFMT Collector Schedule.


Important
- Genesys recommends staggering each Collection Schedule so that LFMT Collections do not start/run at the same time.
- The maximum number of simultaneous connections from all Agents should not exceed more than 10-12 during a single Schedule Collection.
- Each Agent on a host will create the number of connections as defined by the agent's [app_config]/agent_max_outgoing_connections] configuration option.
- For example, if this value is set to 1 for each Agent, then a Collection of up to 10-12 hosts can be completed at once. If this option is set to 4, then 3 hosts should only be collected from at once. Ensure Collection Schedules are configured to not exceed this connection maximum at any given time.
Editing a LFMT Collection Schedule
- In Genesys Administrator Extension, from the LFMT tile menu, select Collection Schedules.
- Click on the row text of the LFMT Collector Schedule in the Collection Schedules pane that you wish to edit; the Edit Collection Schedule pane will appear.
- As required, edit the Name, Start, Timezone, Interval or Exception fields for this LFMT Collector Schedule.
- Add/Remove the appropriate CME Applications from the LFMT Collector Schedule as required.
- Select the button to save any changes to the LFMT Collector Schedule.
Important
- Once saved, the edited Collection Schedule will be Stopped/Disabled and will need to be manually Enabled/Started.
Deleting a LFMT Collection Schedule
- In Genesys Administrator Extension, from the LFMT tile menu, select Collection Schedules.
- Select the appropriate checkbox associated with the LFMT Collector Schedule in the Collection Schedules pane that you wish to delete.
- Click the
 button to Delete the Collection Schedule.
Important
- The Collection Schedule will be permanently deleted.
- There is no undo delete Collection Schedule capability.
Enabling and disabling a LFMT Collection Schedule
- To enable an LFMT Collector Schedule, select the checkbox associated with Collection Schedule, and click the
 button.
 - To disable an LFMT Collector Schedule, select the checkbox associated with Collection Schedule, and click the
 button.
This page was last edited on March 7, 2022, at 10:51.
Comments or questions about this documentation? Contact us for support!